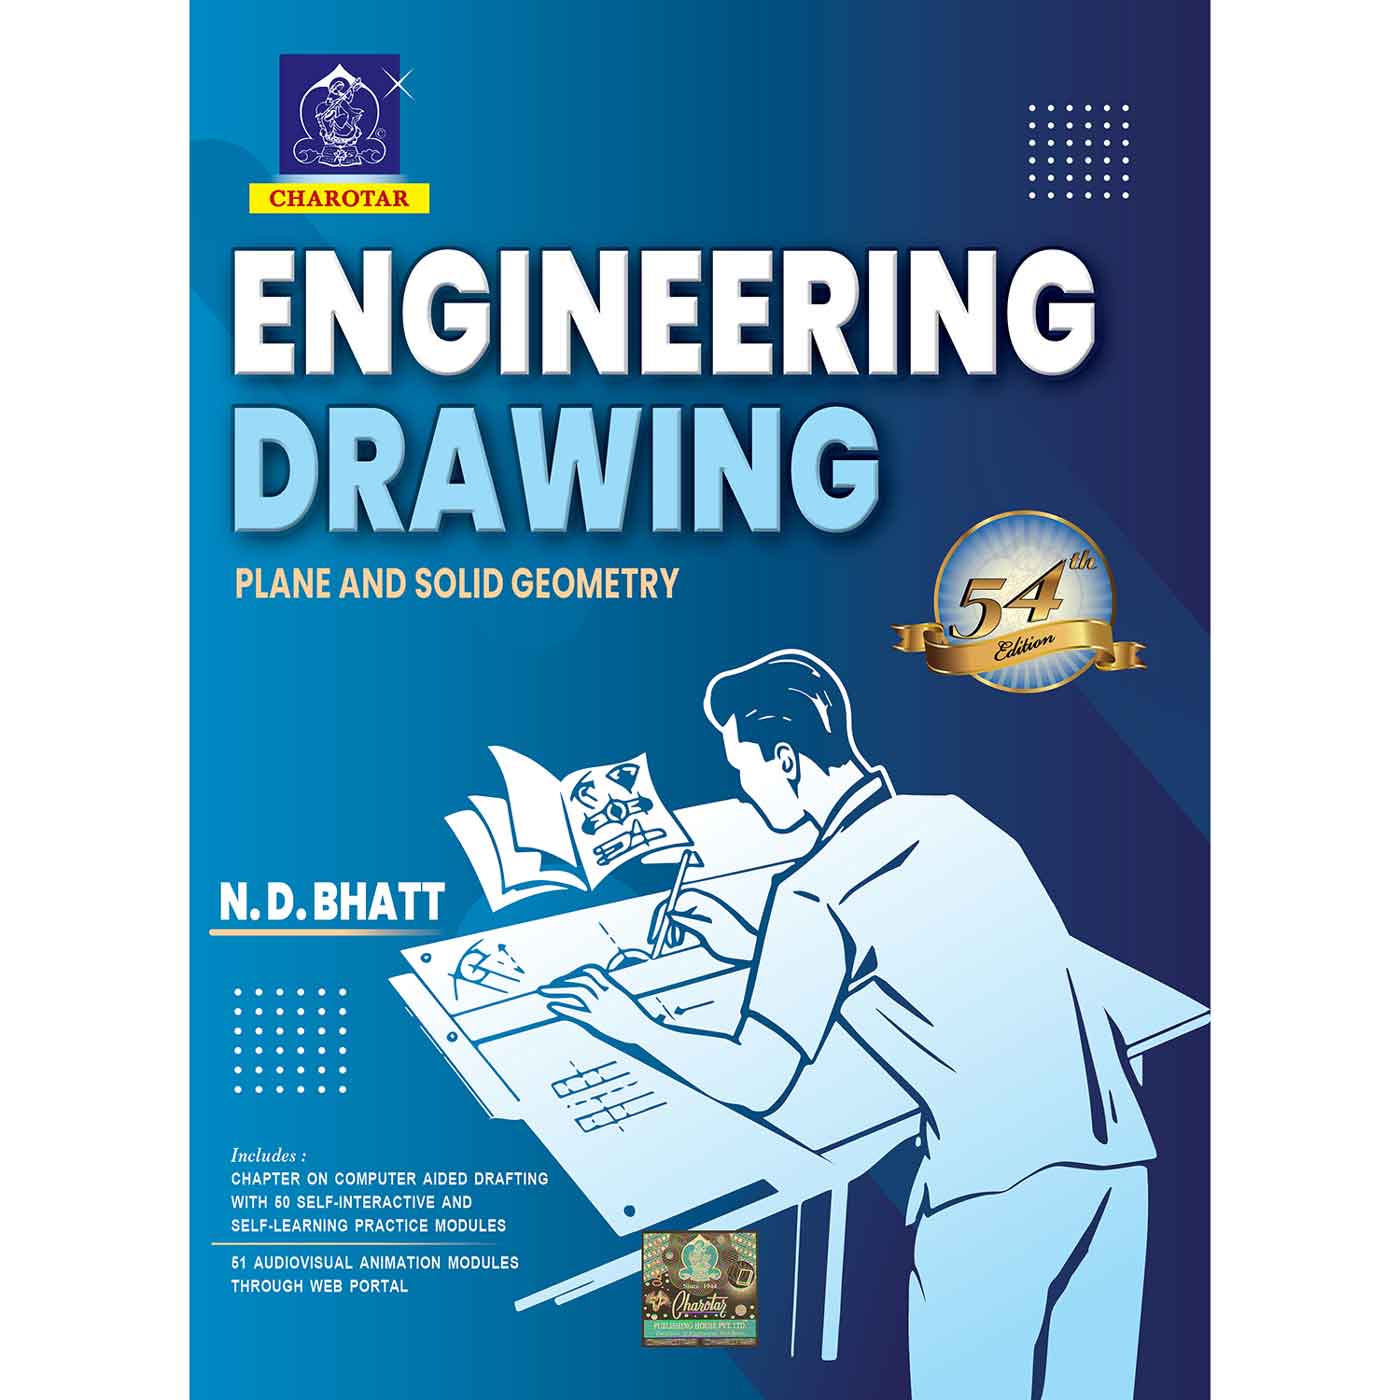
Engineering Drawing By N. D. Bhatt
₹540.00
By N. D. Bhatt
55th Edition 2025 (Fifth Five)
ISBN : 9789385039805
Binding : Paperback
Pages : 704 + 16 = 720
Size (mm) : 235 × 30 × 170
Weight : 990 g
Description
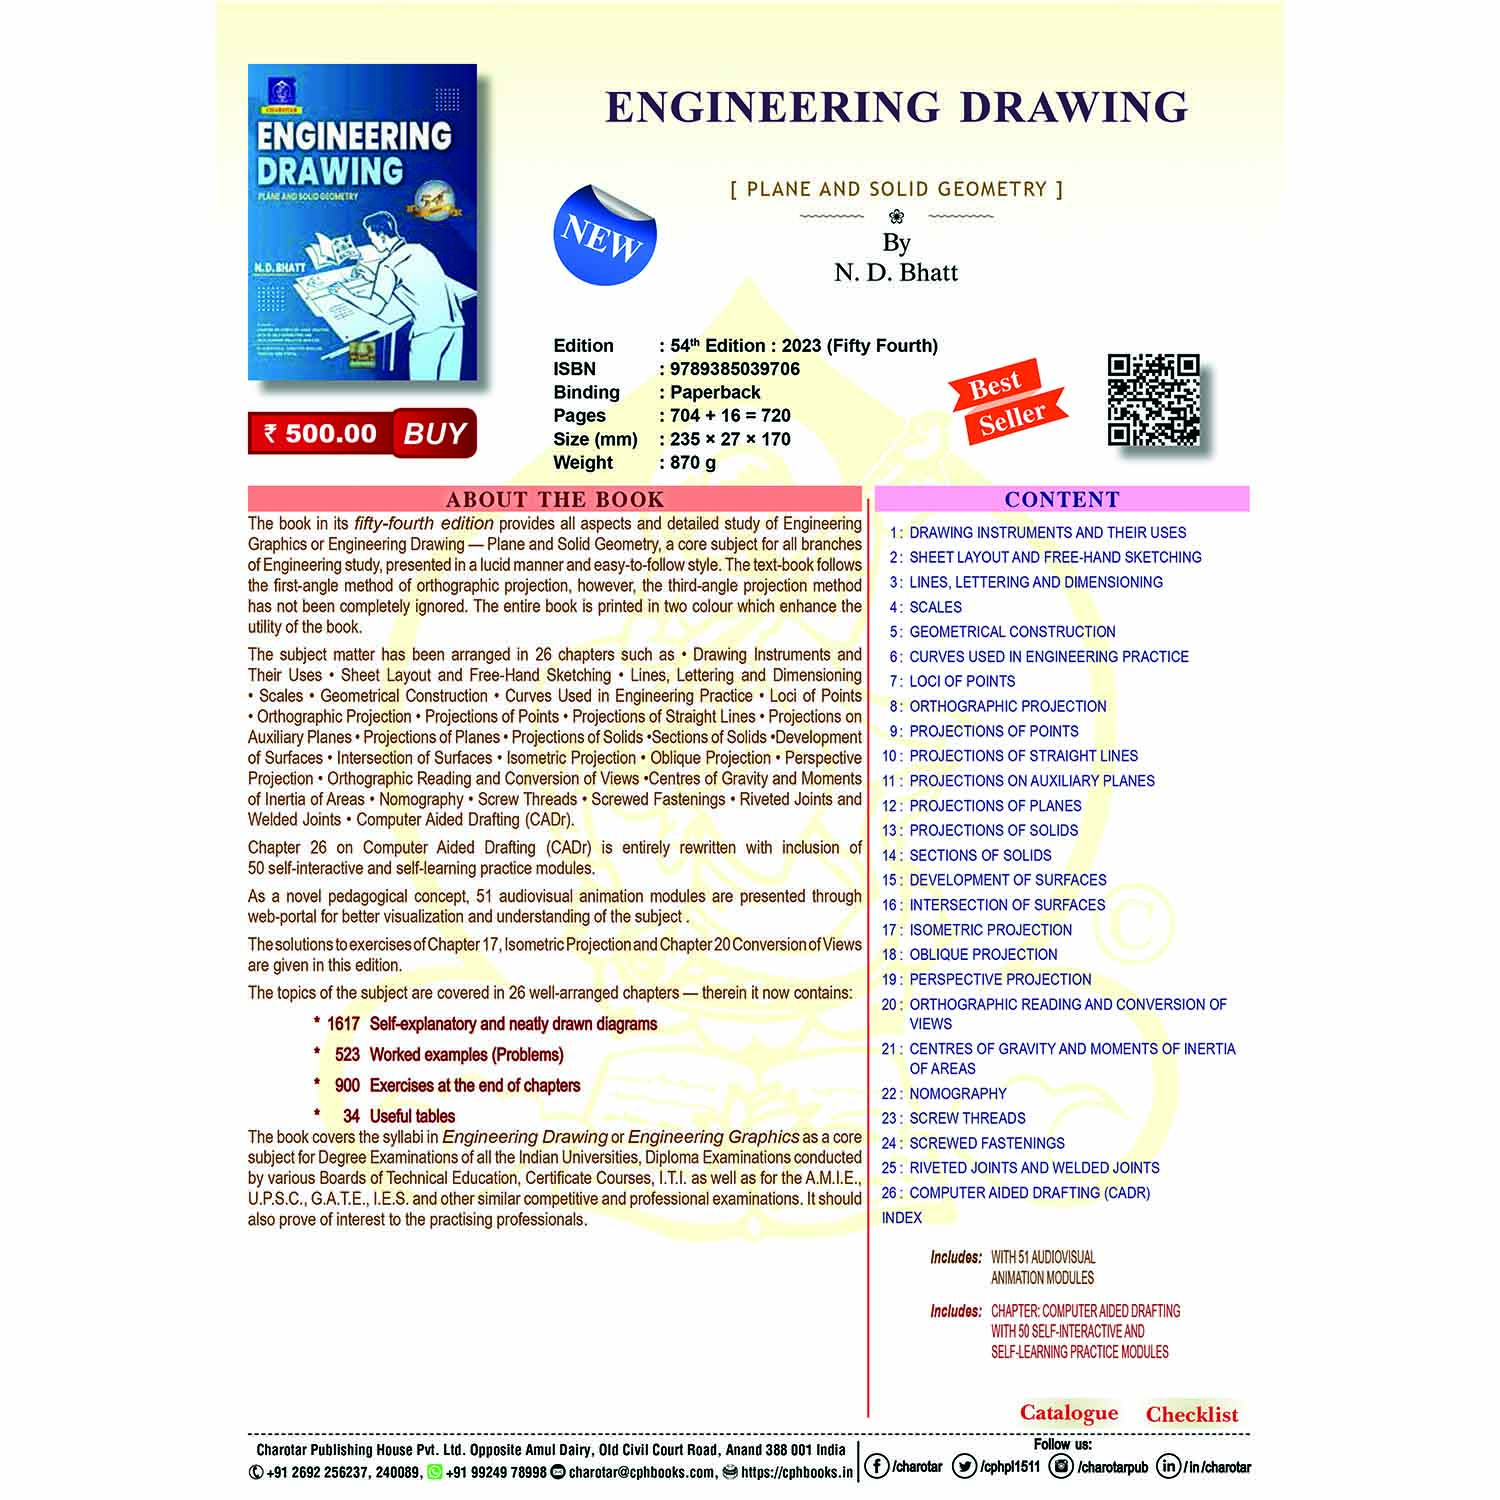
The book in its fifty-fifth edition provides all aspects and detailed study of Engineering Graphics or Engineering Drawing — Plane and Solid Geometry, a core subject for all branches of Engineering study, presented in a lucid manner and easy-to-follow style. The text-book follows the first-angle method of orthographic projection, however, the third-angle projection method has not been completely ignored. The entire book is printed in two colour which enhance the utility of the book.
The subject matter has been arranged in 26 chapters such as • Drawing Instruments and Their Uses • Sheet Layout and Free-Hand Sketching • Lines, Lettering and Dimensioning • Scales • Geometrical Construction • Curves Used in Engineering Practice • Loci of Points • Orthographic Projection • Projections of Points • Projections of Straight Lines • Projections on Auxiliary Planes • Projections of Planes • Projections of Solids •Sections of Solids •Development of Surfaces • Intersection of Surfaces • Isometric Projection • Oblique Projection • Perspective Projection • Orthographic Reading and Conversion of Views • Centres of Gravity and Moments of Inertia of Areas • Nomography • Screw Threads • Screwed Fastenings • Riveted Joints and Welded Joints • Computer Aided Drafting (CADr).
Chapter 26 on Computer Aided Drafting (CADr) is entirely rewritten with inclusion of 50 self-interactive and self-learning practice modules.
As a novel pedagogical concept, 51 audiovisual animation modules are presented through web-portal for better visualization and understanding of the subject.
The solutions to exercises of Chapter 17, Isometric Projection and Chapter 20 Conversion of Views are given in this edition.
The topics of the subject are covered in 26 well-arranged chapters — therein it now contains:
* 1617 Self-explanatory and neatly drawn diagrams
* 523 Worked examples (Problems)
* 900 Exercises at the end of chapters
* 34 Useful tables
The book covers the syllabi in Engineering Drawing or Engineering Graphics as a core subject for Degree Examinations of all the Indian Universities, Diploma Examinations conducted by various Boards of Technical Education, Certificate Courses, I.T.I. as well as for the A.M.I.E., U.P.S.C., G.A.T.E., I.E.S. and other similar competitive and professional examinations. It should also prove of interest to the practising professionals.
Additional information
| Author Name | |
|---|---|
| Book Edition | |
| ISBN | |
| Book Binding | |
| Pages | |
| Size | |
| Weight | |
| Old ISBN | 8185594015, 8185594171, 8185594317, 8185594511, 8185594589, 9789380358178, 9789380358550, 9789380358833, 9789380358963, 9789385039706 |
Content
1 : DRAWING INSTRUMENTS AND THEIR USES
2 : SHEET LAYOUT AND FREE-HAND SKETCHING
3 : LINES, LETTERING AND DIMENSIONING
4 : SCALES
5 : GEOMETRICAL CONSTRUCTION
6 : CURVES USED IN ENGINEERING PRACTICE
7 : LOCI OF POINTS
8 : ORTHOGRAPHIC PROJECTION
9 : PROJECTIONS OF POINTS
10 : PROJECTIONS OF STRAIGHT LINES
11 : PROJECTIONS ON AUXILIARY PLANES
12 : PROJECTIONS OF PLANES
13 : PROJECTIONS OF SOLIDS
14 : SECTIONS OF SOLIDS
15 : DEVELOPMENT OF SURFACES
16 : INTERSECTION OF SURFACES
17 : ISOMETRIC PROJECTION
18 : OBLIQUE PROJECTION
19 : PERSPECTIVE PROJECTION
20 : ORTHOGRAPHIC READING AND CONVERSION OF VIEWS
21 : CENTRES OF GRAVITY AND MOMENTS OF INERTIA OF AREAS
22 : NOMOGRAPHY
23 : SCREW THREADS
24 : SCREWED FASTENINGS
25 : RIVETED JOINTS AND WELDED JOINTS
26 : COMPUTER AIDED DRAFTING (CADr)
INDEX
Details Content
Chapter 1 DRAWING INSTRUMENTS AND THEIR USES
1-1. Introduction
1-2. Drawing board
1-3. T-square
1-4. Set-squares
1-5. Drawing instrument box
(1) Large-size compass with inter chang eable pencil and
pen legs
(2) Lengthening bar
(3) Small bow compass
(4) Large-size divider
(5) Small bow divider
(6) Small bow ink-pen
(7) Inking pen
1-6. Scales
1-7. Protractor
1-8. French curves
1-9. Drawing papers
1-10. Drawing pencils
1-11. Eraser (Rubber)
1-12. Drawing pins, Clips or adhesive tapes
1-13. Sand-paper block
1-14. Duster
1-15. Drafting machine
1-16. Roll-N-Draw
1-17. General suggestions for drawing a sheet
(1) Cleaning the instruments
(2) Pinning the paper to the drawing board
(3) Border lines
(4) Spacing of drawings
Exercises I
Chapter 2 SHEET LAYOUT AND FREE-HAND SKETCHING
2-1. Sheet layout
(1) Sheet sizes
(2) Margin
(3) Border lines
(4) Borders & frames
(5) Orientation mark
(6) Grid reference system
(7) Title block
(8) List of parts or the bill of materials
(9) Revisions of drawing
(10) Folding marks
(11) Scales and scale drawing
2-2. Types of machine drawings
(1) Production drawing
(2) Exploded assembly drawing
(3) Schematic assembly drawing
(4) Drawing for instruction manual
(5) Drawing for installation
(6) Drawing for catalogue
(7) Tabular drawing
(8) Patent drawing
2-3. Free-hand Sketching
(1) Sketching or freehand
(2) Sketching materials
(3) To sketch straight lines
(4) To sketch circles and arcs
(5) Sketching procedure
(6) Steps in sketching
Exercises II
Chapter 3 LINES, LETTERING AND DIMENSIONING
3-0. Introduction
3-1. Lines
(1) Line thickness
(2) Inked drawings
(3) Pencil drawings
3-1-1. Types of Lines
(1) Outlines
(2) Margin lines
(3) Dimension lines
(4) Extension or projection lines
(5) Construction lines
(6) Hatching or section lines
(7) Leader or pointer lines
(8) Border lines
(9) Short-break lines
(10) Long-break lines
(11) Hidden or dotted lines
(12) Centre lines
(13) Cutting-plane lines
(14) Chain thick
(15) Chain thick double-dots
3-2. Lettering
(1) Single-stroke letters
(2) Gothic letters
3-3. Dimensioning
3-4. Dimensioning terms and notations
(1) Dimension line
(2) Extension line
(3) Arrowhead
(4) Leader
3-5. Placing of dimensions
(1) Aligned system
(2) Unidirectional system
3-6. Unit of dimensioning
3-7. General rules for dimensioning
3-8. Practical hints on dimensioning
Exercises III
Chapter 4 SCALES
4-1. Introduction
4-2. Scales
(1) Engineer’s
(2) Graphical scale
(3) Representative fraction
4-3. Scales on drawings
4-4. Types of scales
(1) Plain scales
(2) Diagonal scales
(3) Comparative scales
(4) Vernier scales
(5) Scale of chords
Exercises IV
Chapter 5 GEOMETRICAL CONSTRUCTION
5-0. Introduction
5-1. Bisecting a line
5-2. To draw perpendiculars
5-3. To draw parallel lines
5-4. To divide a line
5-5. To divide a circle
5-6. To bisect an angle
5-7. To trisect an angle
5-8. To find the centre of an arc
5-9. To construct an ogee or reverse curve
5-10. To construct equilateral triangles
ENGINEERING DRAWING
5-12. To construct regular polygons
5-13. Special methods of drawing regular polygons
5-14. Regular polygons inscribed in circles
5-15. To draw regular figures using T-square and set-squares
5-16. To draw tangents
5-17. Lengths of arcs
5-18. Circles and lines in contact
5-19. Inscribed circles
Exercises V
Chapter 6 CURVES USED IN ENGINEERING PRACTICE
6-0. Introduction
6-1. Conic sections
6-1-1. Ellipse
6-1-2. Parabola
6-1-3. Hyperbola
6-1-4. Tangents and normals to conics
6-2. Cycloidal curves
6-2-1. Cycloid
6-2-2. Trochoid
6-2-3. Epicycloid and hypocycloid
6-2-4. Epitrochoid
6-2-5. Hypotrochoid
6-3. Involute
6-4. Evolutes
6-5. Spirals
6-5-1. Archemedian spiral
6-5-2. Logarithmic or equiangular spiral
6-6. Helix
6-6-1. A method of drawing a helical curve
6-6-2. Helical springs
6-6-3. Screw threads
6-6-4. Helix upon a cone
6-7. Cam
Exercises VI
Chapter 7 LOCI OF POINTS
7-0. Introduction
7-1. Loci of points
7-2. Simple mechanisms
7-2-1. The slider crank mechanism
(1) Simple slider crank mechanism
(2) Offset slider crank mechanism
7-2-2. A four-bar mechanism
Exercises VII
Chapter 8 ORTHOGRAPHIC PROJECTION
8-0. Introduction
8-1. Principle of projection
8-2. Methods of projection
8-3. Orthographic projection
8-4. Planes of projection
8-5. Four quadrants
8-6. First-angle projection
8-7. Third-angle projection
8-8. Reference line
8-9. B.I.S. code of practice
8-10. Typical Problems
Exercises VIII
Chapter 9 PROJECTIONS OF POINTS
9-0. Introduction
9-1. A point is situated in the first quadrant
9-2. A point is situated in the second quadrant
9-3. A point is situated in the third quadrant
9-4. A point is situated in the fourth quadrant
9-5. General conclusions
Exercises IX
Chapter 10 PROJECTIONS OF STRAIGHT LINES
10-0. Introduction
10-1. Line parallel to one or both the planes
10-2. Line contained by one or both the planes
10-3. Line perpendicular to one of the planes
10-4. Line inclined to one plane and parallel to the other
Exercises X(a)
10-5. Line inclined to both the planes
10-6. Projections of lines inclined to both the planes
10-7. Line contained by a plane perpendicular to both the reference
planes
10-8. True length of a straight line and its inclinations with the
reference planes
10-9. Traces of a line
10-10. Methods of determining traces of a line
10-11. Traces of a line, the projections of which are perpendicular
to xy
10-12. Positions of traces of a line
10-13. Additional illustrative problems
Exercises X(b)
Chapter 11 PROJECTIONS ON AUXILIARY PLANES
11-0. Introduction
11-1. Types of auxiliary planes and views
11-2. Projection of a point on an auxiliary plane
11-3. Projections of lines and planes by the use of auxiliary planes
11-4. To determine true length of a line
11-5. To obtain point-view of a line and edge-view of a plane
11-6. To determine true shape of a plane figure
Exercises XI
Chapter 12 PROJECTIONS OF PLANES
12-0. Introduction
12-1. Types of planes
(1) Perpendicular planes
(2) Oblique planes
12-2. Traces of planes
12-3. General conclusions
(1) Traces
(2) Projections
12-4. Projections of planes parallel to one of the reference planes
(1) When the plane is parallel to the H.P.
(2) When the plane is parallel to the V.P.
12-5. Projections of planes inclined to one reference plane and
perpendicular to the other
(1) Plane, inclined to the H.P. and perpendicular to the V.P.
(2) Plane, inclined to the V.P. & perpendicular to the H.P.
12-6. Projections of oblique planes
Exercises XII
Chapter 13 PROJECTIONS OF SOLIDS
13-0. Introduction
13-1. Types of solids
(1) Polyhedra
(2) Solids of revolution
13-2. Projections of solids in simple positions
Exercises XIII(i)
13-3. Projections of solids with axes inclined to one of the reference
planes and parallel to the other
13-3-1. Axis inclined to the V.P. and parallel to the H.P.
13-3-2. Axis inclined to the H.P. and parallel to the V.P.
13-4. Projections of solids with axes inclined to both the H.P. and
the V.P.
13-5. Projections of spheres
(1) Spheres in contact with each other
(2) Unequal spheres
Exercises XIII(ii)
Chapter 14 SECTIONS OF SOLIDS
(1) Section planes
(2) Sections
(3) True shape of a section
14-1. Sections of prisms
(1) Section plane parallel to the V.P.
(2) Section plane parallel to the H.P.
(3) Section plane perpendicular to the H.P. and inclined to
the V.P.
(4) Section plane perpendicular to the V.P. and inclined to
the H.P.
14-2. Sections of pyramids
(1) Section plane parallel to the base of the pyramid
(2) Section plane parallel to the V.P.
(3) Section plane perpendicular to the V.P. and inclined to
the H.P.
(4) Section plane perpendicular to the H.P. and inclined to
the V.P.
14-3. Sections of cylinders
(1) Section plane parallel to the base
(2) Section plane parallel to the axis
(3) Section plane inclined to the base
14-4. Sections of cones
(1) Section plane parallel to the base of the cone
(2) Section plane passing through the apex of the cone
(3) Section plane inclined to the base of the cone at an
angle smaller than the angle of inclination of the generators
with the base
(4) Section plane parallel to a generator of the cone
(5) Section plane inclined to the base of the cone at an
angle greater than the angle of inclination of the generators
with the base
14-5. Sections of spheres
(1) Section plane parallel to the H.P.
(2) Section plane parallel to the V.P.
(3) Section plane perpendicular to the V.P. and inclined to
the H.P.
(4) Section plane perpendicular to the H.P. and inclined to
the V.P.
14-6. Typical Problems of Sections of Solids
Exercises XIV
Chapter 15 DEVELOPMENT OF SURFACES
15-0. Introduction
15-1. Methods of development
(1) Parallel-line development
(2) Radial-line development
(3) Triangulation development
(4) Approximate method
15-2. Developments of lateral surfaces of right solids
15-2-1. Cube
15-2-2. Prisms
15-2-3. Cylinders
15-2-4. Pyramids
15-2-5. Cone
15-3. Development of transition pieces
15-4. Spheres
Exercises XV
Chapter 16 INTERSECTION OF SURFACES
16-0. Introduction
16-1. Line of intersection
16-2. Methods of determining the line of intersection between
surfaces of two interpenetrating solids
(1) Line method
(2) Cutting-plane method
16-3. Intersection of two prisms
16-4. Intersection of cylinder and cylinder
16-5. Intersection of cylinder & prism
16-6. Intersection of cone & cylinder
16-7. Intersection of cone & prism
16-8. Intersection of cone and cone
16-9. Intersection of sphere and cylinder or prism
Exercises XVI
Chapter 17 ISOMETRIC PROJECTION
17-1. Introduction
17-2. Isometric axes, lines & planes
17-3. Isometric scale
17-4. Isometric drawing or isometric view
17-5. Isometric graph
17-6. Illustrative problems
17-6-1. Isometric drawing of planes or plane figures
17-6-2. Isometric drawing of prisms and pyramids
17-6-3. Isometric drawing of cylinders
17-6-4. Isometric drawing of cones
17-6-5. Isometric drawing of sphere
17-7. Typical problems of isometric drawing
Exercises XVII
Solutions to Exercises XVII
Chapter 18 OBLIQUE PROJECTION
18-1. Introduction
18-2. Principle of the oblique projection
18-3. The oblique projection and the isometric projection
18-4. Receding lines & receding angles
18-5. Types of the oblique projection
18-6. Rules for the choice of position of an object
18-7. Steps for drawing the oblique projection
18-8. Oblique drawing of pyramid
18-9. Oblique drawing of circle
(1) Offset method
(2) Four centre approximate method
18-10. Oblique drawing of cylinder
18-11. Oblique drawing of prism
18-12. Typical problems of oblique projection
Exercises XVIII
Chapter 19 PERSPECTIVE PROJECTION
19-1. Introduction
19-2. Principle of perspective projection
19-3. Definitions of perspective elements
(1) Ground plane
(2) Station point
(3) Picture plane
(4) Horizontal plane
(5) Auxiliiary ground plane
(6) Ground line
(7) Horizon line
(8) Perpendicular axis
(9) Centre of vision
(10) Central plane
19-4. Station point
19-5. Angle of vision
19-6. Picture plane
19-7. Methods of drawing perspective view
19-7-1. Visual-ray method
19-7-2. Vanishing-point method
19-8. Types of perspective
(1) Parallel perspective or one point perspective
(2) Angular perspective or two point perpective
(3) Oblique perspective or three point perspective
19-9. Distance points
19-10. Measuring line or line of heights
19-11. Perspectives of circles & solids
ENGINEERING DRAWING
19-12. Typical problems of perspective projection
(1) Visual-ray method – by means of the top view and the
front view
(2) Visual-ray method – by means of the top view and the
side view
(3) Vanishing-point method
Exercises XIX
Chapter 20 ORTHOGRAPHIC READING AND CONVERSION
OF VIEWS
20-1. Introduction
20-2. Reading of orthographic views (Blue-print reading)
20-3. Missing lines and missing views
20-4. Identification of planes
20-5. Conversion of pictorial views into orthographic views
20-6. Orthographic projection
20-7. Procedure for preparing a scale-drawing
20-8. Illustrative problems
Exercises XX
Chapter 21 CENTRES OF GRAVITY AND MOMENTS OF
INERTIA OF AREAS
21-0. Introduction
21-1. Centre of gravity
21-1-1. Centres of gravity of symmetrical areas
21-1-2. Centres of gravity of unsymmetrical areas
21-1-3. Illustrative problems on centre of gravity
21-2. Moments of inertia of areas
(1) Definition, (2) Unit
(3) Graphical method
21-3. Illustrative problems on moments of inertia
Exercises XXI
Chapter 22 NOMOGRAPHY
22-0. Introduction
22-1. Types of nomographs
22-2. Definitions of various terms
22-3. Principle of construction of nomographs of three variables
22-4. Method of constructing parallel scale nomographs
22-5. Layout of nomographs
22-6. Z-type nomographs
Exercises XXII
Chapter 23 SCREW THREADS
23-0. Introduction
23-1. Definitions
(1) Crest, (2) Root, (3) Flank, (4) Angle
(5) Depth, (6) Nominal diameter
(7) Outside or major diameter
(8) Core or minor diameter
(9) Effective diameter
(10) Pitch, (11) Lead, (12) Slope
23-2. Forms of screw threads
23-2-1. Triangular or V threads
(1) Unified thread
(2) Metric thread
(3) Whitworth thread
(4) British Standard Fine and British Standard Pipe threads
(5) Sellers thread
(6) British Association thread
23-2-2. Square thread
(1) Acme thread
(2) Knuckle thread
(3) Buttress thread
23-3. Conventional representation of threads SP: 46-2003
23-4. Multiple-start threads
23-5. Right-hand & left-hand threads
Exercises XXIII
Chapter 24 SCREWED FASTENINGS
24-0. Introduction
24-1. Types of nuts
24-1-1. Hexagonal nut
24-1-2. Square nut
24-2. Types of nuts for special purpose
(1) Flanged nut
(2) Cap nut
(3) Dome nut
(4) Cylindrical or capstan nut
(5) Ring nut
(6) Wing nut
24-3. Washers
24-4. Bolts
24-5. Forms of bolts
(1) Hexagonal-headed bolt
(2) Square-headed bolt
(3) Cylindrical or cheese-headed bolt
(4) Cup-headed or round-headed bolt
(5) T-headed bolt
(6) Countersunk-headed bolt
(7) Hook bolt
(8) Headless tapered bolt
(9) Eye-bolt
(10) Lifting eye-bolt
(11) Tap-bolt or cap-screw
(12) Stud-bolt or stud
24-6. Set-screws
24-7. Locking arrangements for nuts
(1) Lock-nut or check-nut
(2) Split-pin
(3) Slotted nut
(4) Castle nut
(5) Sawn nut or Wiles nut
(6) Simmond’s lock-nut
(7) Penn, ring or grooved nut
(8) Stop-plate or locking-plate
(9) Spring-washer
24-8. Foundation bolts
(1) Eye or Hoop bolt
(2) Rag bolt
(3) Lewis bolt
(4) Cotter bolt
(5) Curved or bent bolt
(6) Squar-headed bolt
24-9. Spanner
24-10. Longitudinal or bar stay
24-11. Conventional symbols for nuts and bolts
Exercises XXIV
Chapter 25 RIVETED JOINTS AND WELDED JOINTS
25-1. Introduction
25-2. Riveting
25-2-1. Caulking and fullering
25-3. Forms and proportions of rivet-heads
25-4. Failure of riveted joints
25-5. Dimensions of a riveted joint
25-6. Types of riveted joints
25-6-1. Lap joint
25-6-2. Butt joint
25-7. Rolled-steel sections
25-7-1. Connection of plates at right angles
25-7-2. Gusset stay
25-8. Welded joints
ENGINEERING DRAWING
25-8-2. Types of welding process
25-8-3. Types of welded and welds joints
(1) Types of welded joints
(2) Types of welds
25-8-4. Representation of welded joints
Exercises XXV
Chapter 26 COMPUTER AIDED DRAFTING (CADR)
26-1. Introduction
26-2. Computer Aided Drafting
26-3. Computer
26-3-1. Processor (CPU)
26-3-2. Display
26-3-3. INPUT Devices
26-3-4. Graphic Output Devices
26-4. CAD Software
26-5. AutoCAD
26-5-2. Classic screen layout of autocad 2010
26-5-3. Function keys
26-5-4. Drawing Entities
26-5-5. Drafting Aids
26-5-6. Editing of a Drawing
26-6. Symbol Library
26-7. Two dimensional drawings
26-8. Isometric drawings
26-9. 3D Geometrical Modeling
26-9-1. 3D Wireframe Modelling
26-9-2. 3D Surface Modelling
26-9-3. 3D Solid Modelling
26-9-4. Commands To Generate Profile Based 3D Solids
26-10. Three Dimensional Drawings
26-11. Perspective View In Autocad
Exercises XXVI
Index
Only logged in customers who have purchased this product may leave a review.





Reviews
There are no reviews yet.